
")
Firefly III – Setup on Synology (Docker)
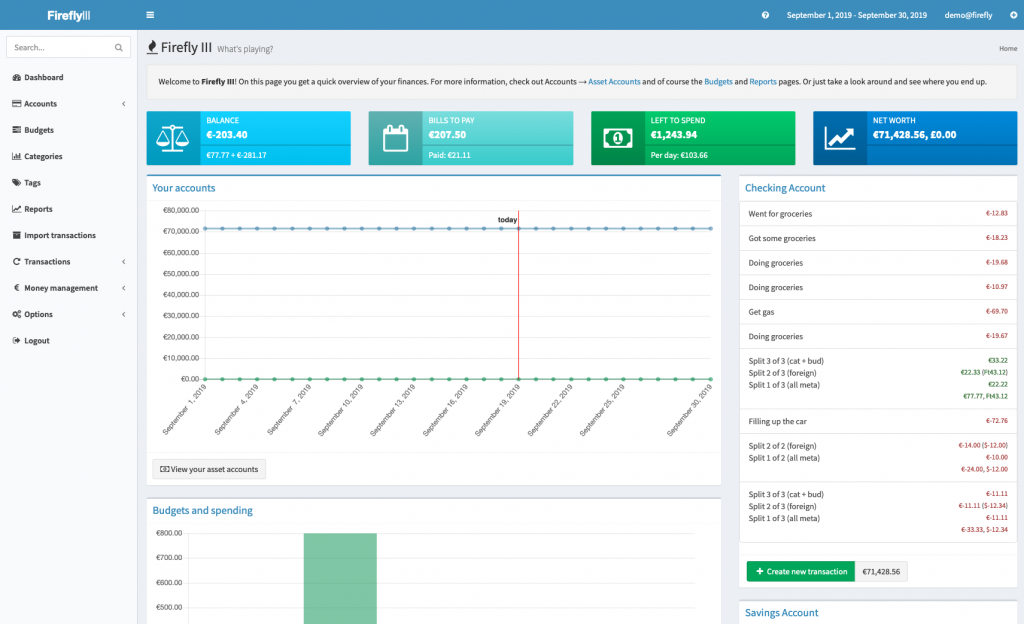
Firefly III is a (self-hosted) manager for your personal finances. It can help you keep track of your expenses and income, so you can spend less and save more. Firefly III supports the use of budgets, categories and tags. It can import data from external sources and it has many neat financial reports available. Here are some screenshots.
If you are using a Synology NAS you can easily use a Docker container to install Firefly, following the instruction below. The original docker installation instructions from Firefly’s website are available here.
Docker installation on Synology (DSM 6.2)
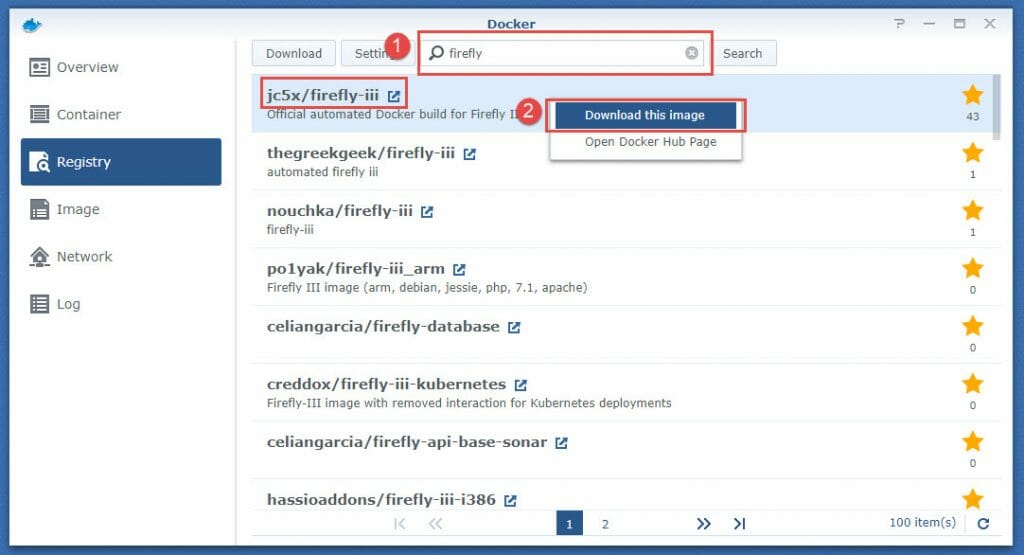
We are going to use the official automated Docker build for Firefly III: jc5x/firefly-iii
Create a database
You will need a DB to store firefly data. Synology offers a native app for a MariaDB server. You can just install the MariaDB app from the “Package center” and then use this guide to understand how you can manage it.
After you complete the setup, create a new DB and a new user with access to that DB. Take a note of the following information, you will need it later:
- Database Name
- Database user name
- Database user password
Download the image
Open the docker native Synology app (or first install it from the “Package center” if it’s not already available for your device) and go to the “Registry” tab. Search for firefly, in the top middle textbox. Select the line with the name “jc5x/firefly-iii”, right click and click the “Download this image” option and select the build named “latest”.
You’ll need to wait for a couple of minutes to download an image of around 600MB. As soon as the image has been downloaded successfully, Synology will notify you.
Setup the docker image
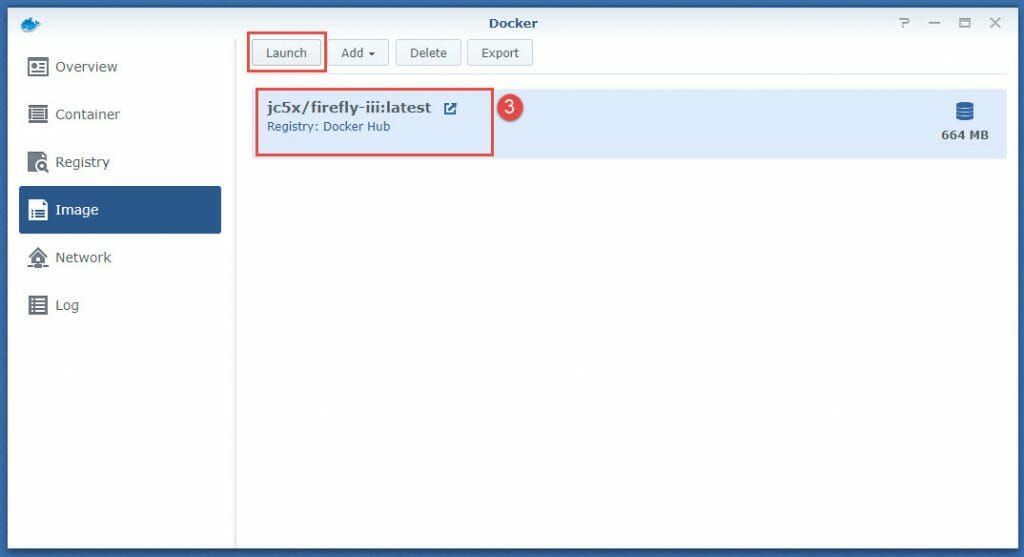
After the download has finished, go to the “Image” tab, select the “jc5x/firefly-iii” image and the click “Launch”.
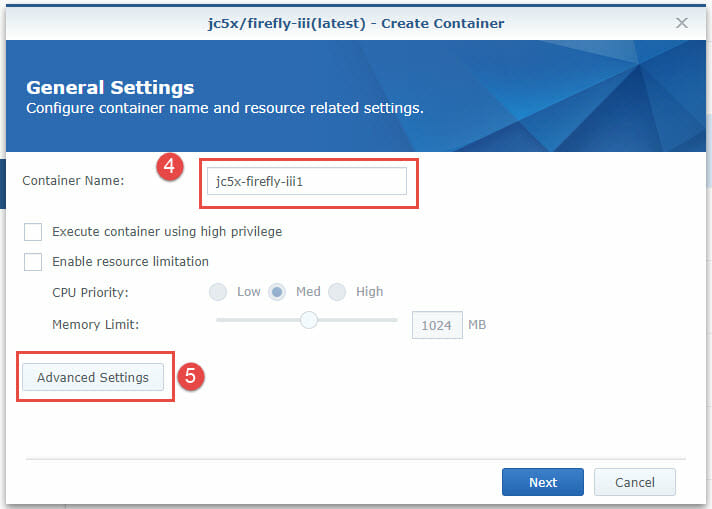
On the first screen you will see, choose any container name you like for your new docker image (step #4) and then click the “Advanced settings” button.
On the new window, on the “General settings” tab, tick the “Enable auto-restart” option.
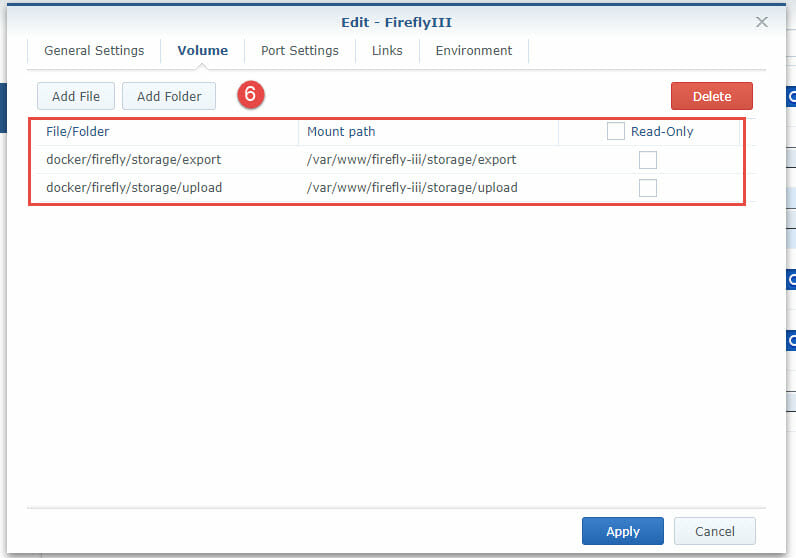
On the “Volume” tab, you will need to add 2 new folders, one for file exports and one for file uploads. Click the “Add folder” button and create 2 new folders under your Synology’s HDD, for example docker/firefly/storage/upload and docker/firefly/storage/export.
The mount path, for each folder needs to be the following:
- Upload: /var/www/firefly-iii/storage/upload
- Export: /var/www/firefly-iii/storage/export
The end result should look like the following example:
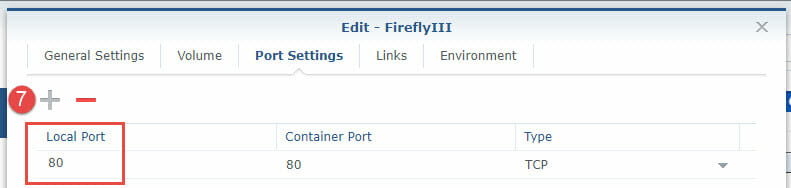
On the “Port settings” tab, set the “Local port” to the port you would like to use to access the Firefly web page. The “Container port” should be set to “80”.
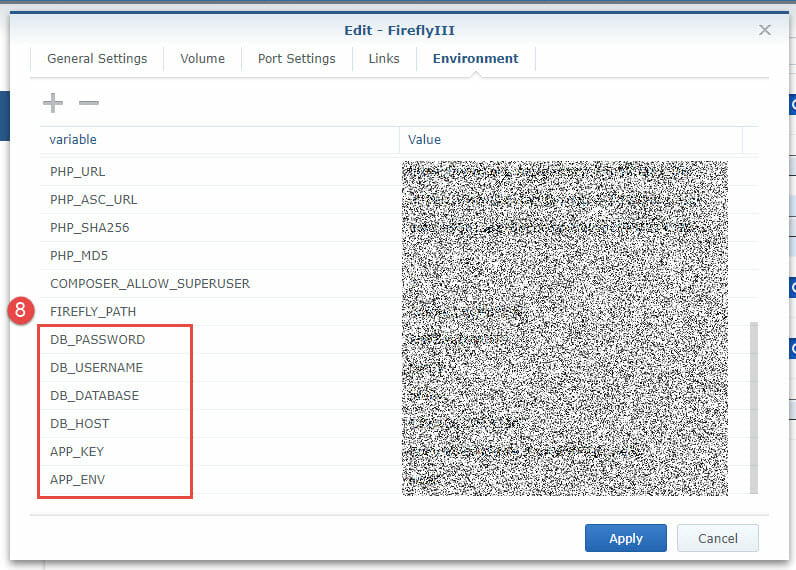
Skip the “Links” tab and go to the “Environment” tab. You will need to setup the following environment variables:
- APP_ENV: Set to “local”
- APP_KEY: Use a random string of exactly 32 chars
- DB_HOST: The IP address and port of your DB server (e.g. 192.168.1.1:3000)
- DB_DATABASE: The name of the database you created in MariaDB
- DB_USERNAME: The name of the user with access to the database
- DB_PASSWORD: The password of the DB user
- APP_URL: (Optional) Use for reverse proxy (How to guide)
- TRUSTED_PROXIES: (Optional) Use for reverse proxy (How to guide)
If you are using MySQL instead of MariaDB or for some other reason the connection to the DB is not working, you can add the following environment variables:
- DB_CONNECTION: Set to “mysql”
- DB_PORT: Set to the port of your database server
Click “Apply” to save all the changes.
Start Firefly
You will need to wait a coupe of minutes to setup the DB and the files, when booting Firefly the first time. When everything is completed, you will be able to log in using you Synology NAS IP address and the port you selected under “Local port”.
